Balsamic & Rosemary Pork Tenderloin w/ Roasted Veggies

Hooray for experiments in meat cookings! I had not had much (okay…none) experience with cooking pork tenderloin, but I can’t say the idea hadn’t frequently piqued my interest.  As ridiculous as it may sound, I love the idea of a plate full of several small medallions of sliced meat, “crusted” on the outside with  flavor and the natural char from the grill.  So flavorful, yet so simple! None of this is truly important, I know – it all becomes “one” in the stomach, after all.  But why not let the simplest things become the enjoyment within the culinary experience? I’m all for these little mini, meaty delights – just give me lots of those cute little rounds o’ protein!

At my last Trader Joe’s stock-up session, I decided to pull a log of pork tenderloin from the meat fridge.  Commitment is the in the purchase after all; so soon after, I did a quick internet search to nail down the important concepts – such as – how high to heat the grill, how long to cook it, and what people are typically using to marinate (all building up to the development of ideas to chalk it up to a 4HB-worthy quality).  So I decided to keep it simple this go-around….and trust me; sometimes less IS more! (I feel like I say that a lot.  That’s good).

Now to the part where we make good things happen.

Ingredients:
1 lb pork tenderloin
1/2 cup extra virgin olive oil
1/2 cup balsamic vinegar
A few springs, fresh rosemary (or 1 tsp dried rosemary)
Salt & Pepper, to taste
1 tsp garlic, minced

Directions:

  • Season tenderloin with a light salting, and less-light peppering.  If you’re feeling extra-oderificly frisky, add a touch of garlic salt in lieu of regular salt.
  • Pour the extra virgin olive oil and balsamic vinegar into a gallon-sized Ziploc bag.  Toss in the rosemary.  Put in the fridge and let marinate for at least 30 minutes (or overnight!).
  • Meanwhile, this would be a good time to start preparing the veggies.  Since this particular pork tenderloin will be grill-roasted, I thought I’d take advantage of the cooking tenderloin to allow some veggies to roast right alongside with it, soaking up its smoky & juicy goodness.  I selected “good” grilling/roasting veggies, such as: red onion, bell peppers, asparagus, and some squash.
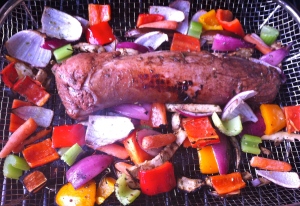
  • On a grill preheated at medium-high, place the pork tenderloin either directly on the oiled grate, on a roasting pan (as imaged), or even on/in aluminum foil.  The latter of the two would make the most sense if you are planning to roast your veggies alongside the tenderloin.  But it works just as well to grill these on separate space on the grill.  Don’t limit yourself!
  • Cook the tenderloin for about 12 minutes, rolling it to alternating sides every few minutes or so to ensure even cooking.  If you reserved the freezer bag of marinade, you can use it to baste the tenderloin, occasionally, while it’s grilling.
  • About midway into the cooking process, add your chopped veggies alongside the tenderloin.  My first try at this, I added the veggies at the same time as the tenderloin, but ended up removing them much earlier (and covering with foil to keep warm!), as they clearly cook much faster than the meat.  Noted for future!
  • Lay a sprig or two of fresh rosemary over top the tenderloin/veggies for added flavor, if preferred.

  • After about 12 minutes, remove the tenderloin from the grill and let sit for a few minutes.

  • Slice up into medallions (mmm juicy!).

  • Distribute sliced pork rounds and piled-up roasted veggies to your plates!
Lemon Pepper Tilapia

Shown above with:  Squash Noodles with Stir-Fried Veggies

I’d like to give a shout out to all the little fishies out there! Thanks for offering up a great way to throw some variety into the meal rotation.  I’m sure you flip for joy over your role in my world.

Cooking fish can be much quicker and simpler to prepare than a boring ol’ chicken breast. Truly! And let’s be honest.  It’s not every day that I am so prepared with a plan before I even head out the door for the day (a.k.a. slow-cooker meals…which clearly takes some pre-planning).  And some days, I’m just pretty beat from the day, and don’t particularly feel like spending too much time cooking up some creation! So in these situations, there’s not much that really beats a quick fix of a fish on top of a huge pile of salad veggies.

The idea of seafood is a bit intimidating initially for some, for certain. But tame it out a little, use the right seasonings, and you’ve got a good potential of bringing those fish-fearing folks over to the sea side.  One thing that I have learned, at least when it comes to white fish such as tilapia and halibut, is that less is more.  And nothing seems to handle this on the seasoning front better than a lemon/pepper version.

One disclaimer I always like to note about fish is – the less “fishy” they smell, the fresher those little flippers are.  So if you’re buying your fish already thawed at the seafood counter, I’d advise using it within 2 days.

Ingredients:
1 tbsp coconut oil (or extra virgin olive oil, for cooking)
1/2 tbsp extra virgin olive oil (for coating the fish, pre-seasoning)
3 filet tilapia, approximately 3/4 to 1 lb (for 2 people)
1 lemon
Salt
Black pepper, freshly ground

Directions:

  • Rinse tilapia under cold water, and pat to dry.
  • With a basting brush, lightly coat the fillets on all sides with extra virgin olive oil. 
  • Lightly season both sides of the tilapia with salt and freshly ground black pepper.
  • Slice the lemon into wedges, and squirt with a couple of sprays on each side.

  • Heat coconut oil in a large frying pan, over medium-high heat.
  • Once the oil has heated up (but not yet smoking), add the tilapia filets.

  • Cook for 3-4 minutes on each side (around 7 minutes, total).
  • Top it off with another spritz of fresh lemon juice, for added flavor (and squeeze over top the salad veggies, if applicable). 
  • Serve!

See? Sometimes the intro is just way more monstrous than the recipe, itself!

*Note:  This same recipe also works well if you prefer to cook it on a grill.  Simply omit the coconut oil and pan-frying steps.  Put the fish on a square of aluminum foil, and place the foil on a pre-heated grill over medium-high heat.  Cooking time will be similar (if not a minute or 2 more), but you can always test for done-ness once the fish can be flaked easily with a fork.

Tilapia over a veggie-filled salad, sprinkled with fresh cilantro and red cabbage

Slow Cooked Carnitas

Ole!

As most of us have come to learn, Mexican food tends to be just about the simplest cuisine to suit the 4HB lifestyle, with only slight modifications.  Has the riceless Chipotle Burrito Bowl become your fall-back meal plan, fast-food staple, yet? I’m originally from South Carolina, and was never a huge fan of Mexican food until I moved out to San Diego almost 7 years ago. It wasn’t long until I actually craved Mexican food.  I accredit this to one of two things:  subsequent deviation from a once-extremely picky palate (a.k.a – growing the heck up); or new exposure to Mexican food in a location actually close to the border (with no mass body of water in between!).   It’s all about authenticity sometimes; and good (almost-local) ingredients!

Once again, I’ve shot off on quite the tangent.  But when I think carnitas, I think of a good, home-cooked, Mexican dish.  This is one of my husband’s and my favorite slow-cooker meals.  Work all day; fiesta in the eve! Tender and juicy, with a touch of outer crispness; this hunk of meat is flavorful and filling!

Let’s get right down to this porky delight:

Ingredients:
2 lbs boneless pork butt (or pork shoulder)
1/2 medium yellow onion
2-3 cloves garlic, chopped or minced
1 tsp salt
2 tsp black pepper, freshly ground
2 tsp dried oregano
2 tsp paprika
2 tsp cumin
1/2 tsp crushed red pepper flakes
1/2 tsp liquid smoke (optional)
2 tsp Butt Rub Seasoning (optional)
Fresh cilantro, chopped (for garnish)

Directions:

  • Cut up the pork butt into approximately 1 1/2 inch cubes.  If you’re purchasing your pork from a butcher, they will usually cut it for you, if you ask.  
  • Trim off some of the excess fat, if you desire (but not all of it !)  If you’re like me, and a little frightened by the big splotches white, just trim off some of the fat.   Don’t get too obsessive over it, however, as you actually do want some of that fat to cook with the meat in order to allow for extra tenderness, juiciness, and flavor.  And trust me – the fat will melt right off of the meat, anyway, when it is finished.
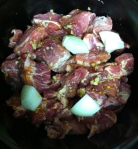
  • Toss the cubed meat into the slow-cooker.
  • Season the meat with salt, pepper, oregano, paprika, cumin (and any other seasonings, should you choose to add-on), and toss to coat.  If using liquid smoke, pour the small amount into the pot.
  • Sprinkle the minced garlic & red pepper flakes over top the meat.  Cut the yellow onion half into 2 or 3 chunks, and rest the pieces, intact, on top of the meat.

If you are making this ahead of time, put the lid over the crock pot and let sit  in the fridge, absorbing that extra flavor. Otherwise, go ahead and plug it in and get it started! Trust me, your flavor will be delicious, as is.

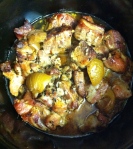
  • Cook on low setting for 6-7 hours.

  • When finished, and ready to serve; remove from the pot with a meshed or slotted spoon, placing it into a pile on a cutting board or plate.
  • Discard the onion pieces.
  • Using a fork, press onto the pork to shred into pieces.  This will not be a labor intensive process, in the least, as it will literally just fall apart under the fork.
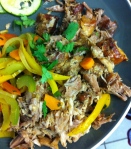
  • Dish out onto plates, and garnish with freshly chopped cilantro.  Serve as-is, or top with a seasoned & sautéed assortment of bell peppers, onion, and carrots; as imaged below. This mix of veggies, I’ve found, complements the meat really well! And, of course, it offers more resemblance to the innards of a yummy burrito.

Squash Noodles with Stir-Fried Veggies

This might not necessarily qualify as a brand new recipe, but more of a build-off of the recently posted standard squash noodle method.  This just takes these noodles a step further by preparing, and tossing them with, sautéed/stir-fried veggies.

This is my absolute favorite way to prepare squash noodles.  It’s a fantastic way to use up any remaining veggies in your fridge toward the end of the grocery week.  Call it, “shopping your fridge,” if you will!  But even more importantly – it’s a great way to get a good mix of vegetables in with your meal! Veggies are good for you, kiddos! Haven’t you heard?

So – if you’ve already read through (and perhaps even mastered for yourself!) the squash noodles recipe, you can probably skip over some of the beginning preparation below.  But for the sake of consistency, and for any new recipe-surfers out there; I’ve included the full process.

Ingredients:
1-2 large yellow squash, zucchini squash, or eggplant (all work well for this)
1 tbsp coconut oil (or extra virgin olive oil), separated
Salt & Pepper, to taste
1/2 tsp minced garlic
1/4 tsp red pepper flakes (contingent upon your preference of spiciness!)
Hodgepodge of chop-able veggies

Directions:

  • Wash and pat dry the squash or eggplant.
  • With a vegetable peeler, peel away the thick outer skin and discard
  • Once you have removed the outer skin, continue using your vegetable peeler along the full length of the squash to peel away into fettucine-like sized strands. (Tip: I find the best way to maintain full-length strands is by laying the squash down on its side on the cutting board, and pulling the peeler along, horizontally – rather than holding the squash as you peel)
  • Continue to rotate the squash as you peel away the strands, so your “noodles” remain somewhat uniform
  • Stop peeling once you reach the seeds, as the seedy strands will become mushy in the cooking process (I usually end up either chopping up the remaining vegetable to toss into a stir-fry for mixing with the noodles, or save it to chop up into a salad, later…I just hate wasting anything!)
  • Season the noodles with salt, pepper, and any other seasonings you wish
  • Put plate aside, and chop up your veggies for the stir-fry.  (My standards: red or yellow onion, assorted bell peppers, broccoli, spinach leaves, jalapeno, sliced mushrooms, the remainder of the squash/eggplant post de-noodling).
  • In a medium frying pan, over medium-high heat, add the first 1/2 tbsp coconut oil. Once the oil is hot (not smoking), add the veggies and minced garlic, and saute for about 5-7 minutes until vegetables become soft.
  • Once almost cooked to completion, dump the contents into a paper plate to sit while you cook the noodles (below).
  • Using the same frying pan as was used to cook the veggies, heat the second 1/2 tbsp of coconut oil over medium-high heat.  Once the oil is hot (not smoking), add the squash strands.
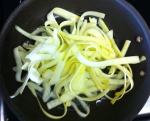
  • Saute the noodles in the pan, pushing them around frequently for 2 minutes as they cook in the oil.  The squash will turn a bright color when finished, and will have become limp and noodle-like.  2 minutes is all it takes, and your noodles are complete!
  • Once the squash noodles are almost at that 2-minute mark, I then dump the stir-fried veggie contents from the paper plate, back into the pan with the noodles, and toss briefly together to combine and reheat.
  • You’re now fully ready to distribute the oh-so-colorful mix of veggies & noodles onto your plates to enjoy! Hooray!!

Garlic Cauliflower “Faux Mashed Potatoes”

Who other than myself misses a big heaping pile of smooth, warm mashed potatoes on their plate? We’ve been grilling more steaks these days while on the 4HB; but I have to confess that steaks just taste better with a wholloping side of garlic mashed potatoes. There’s just something about that combo!

When I was initially exploring more variety in meals within the 4HB scope, cauliflower mashed potatoes came up quite a bit in my internet searches.  At that point, I wasn’t quite bored enough yet with our current meal plans to really miss mashed potatoes that much; but naturally, I did still want to give it a shot.  It tasted good and all, for being seasoned cauliflower – but in no way did it turn out like mashed potatoes! Maybe I didn’t follow the recipe correctly.  I wouldn’t put it past myself – sometimes I’m just a little too impatient.  So I accepted my recipe fail and stuck to other sides. 
Then – I stumbled upon a paleo site that delivered a very different method for making cauliflower mashed potatoes.  It held the golden ticket of all that is good in the world of cauliflower “faux mashed potatoes.”  This is pretty much as close as you’re going to get to the make-believe mashed potatoes, my friends! It’s pretty darn close, for sure.  And – it’s completely re-heatable.  I’ve not come across much on the side front that is worth considering nuking for a round two. And I could swear that eating these actually seems filling (perhaps it’s just that potato memory ringing in the back of my head).  But irregardless of reasoning, I have no trouble saving some leftovers with this one.  Thank you, for posting this recipe, new hero!

I’m seriously excited to spread the word on this side dish recipe.

Ingredients:
1 large head cauliflower
5-6 garlic cloves
Salt
2 tbsp butter (grass-fed, if you have it)
1/4 tsp nutmeg
Freshly ground pepper, to taste

Directions:

  • In a large pot, with a steamer insert, fill with about 1 inch of water and heat on high heat to boil.  Wash the cauliflower.

  • While you’re waiting for the water to boil, chop up the head of cauliflower into smaller florets and stems. Slice up your garlic cloves into just a few pieces, per clove – these will be further blended down later in the food processor.

  • Once the water is boiling, add the cauliflower pieces and garlic slices into the steamer and season with salt (don’t be shy).  Cover with a lid and steam for at least 10 minutes. A little more won’t hurt anything, but this should be all you need.

  • Dump into a colander to drain.

  • Then, pour the contents of your colander into a food processor, fitted with a steel blade.
  • Add ground pepper, nutmeg, and butter.
  • Process everything until completely smooth. Add any other seasonings that you desire, and it’s ready to go!

It’s still really warm at this stage in the process, too, so ready to serve! But however (or whenever) you so choose to enjoy this creamy concoction, you can seal it up in a microwaveable container and store in the fridge for a few days, until that time comes.  When you’re ready to enjoy it, just heat it up for a few minutes, stirring once or twice during the microwaving process to evenly distribute the heat.

Lemon and Rosemary Baked Salmon

I guess you can say I dig the fishes.  Who doesn’t like the idea of a solid chunk of Omega-3’s kickin’ in their system? Yes, fish are pretty good for you; and you can do a good job of making them tasty.  I once cowered at the idea of cooking fish…that is, before I knew much about how to cook ’em. Seems like it would be complicated — right? Not so much.  Probably one of the easier, less time-consuming dinners.  Sure, maybe the fish counter is a TAD pricier than the haphazardly piled pre-packaged chicken breasts a few feet down.  But you can’t beat variety; and a little dose of extra health benefits as a bonus, at that.  

As for salmon, it is one of my absolute favorites.  I pretty much stick to the fish basics: salmon, and the commonly-known white fish: halibut and tilapia.  Let it be known, however, that I am not against other types of fish! I just have these down pretty well at this point…and I’m satisfied! When I feel the itch to expand….oh – I will expand.  And you’ll probably read a blog write-up about it. Isn’t life predictable like that?

Have I successfully “lured” you in yet?

Let’s begin.

Ingredients:
1 lb salmon steak
1/2 tbsp extra virgin olive oil
1 lemon
2 sprigs rosemary
1/4 tsp salt (or more, to taste)
1/4 tsp pepper (or more, to taste)

Directions:

Preheat oven to 350 F

Pull the salmon from the refrigerator.  Now, there are several ways to buy salmon.  I usually get it straight from the counter at Henry’s (or other establishment where I consider the butchers to be super friendly – only because it makes me come back for more! And I love it when butchers give you unsolicited cooking tips if you aren’t exactly familiar with a product).  But you can also buy salmon frozen.  You’ll need to make sure to think ahead and thaw it out by either leaving the frozen salmon in the fridge overnight and/or during the day; or defrosting under cold water.  Use caution when defrosting on the spot, however; as you do not want to start the cooking process during the defrost process. 

Rinse off the salmon under cool water.  (note:  do not rinse seafood under warm water, as this is a bacteria catalyst! And to repeat myself – you don’t want to start warming the fish before you actually cook it.  Be gentle folks!! Be sweet to your salmon!).

After rinsing, place the salmon on a baking pan lined with aluminum foil.

Lightly drizzle  the fish with olive oil and spread with a basting brush to coat the skinless portion of the fish.

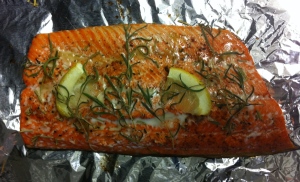
Season with sea salt and pepper; squeeze the juice from a small slice of your lemon over the meat.  Cut the lemon slice into 2 halves and rest on top of the fish.  Place a couple sprigs of fresh rosemary over top, to evenly distribute over the meat.

Now, pop that fish into the oven.

Bake for approximately 15 minutes.  You can easily test when it’s ready if it flakes easily with a fork.  I tend to like my meats cooked more rather than less (I know, the shame!), but I left this one in for maybe 17 minutes.  But I could have easily pulled it out in 15.

Note: Another important thing to keep in the back of your skull is that fish will continue to cook once you’ve pulled it out of the oven.  So don’t overcook, or you’ll have a pretty dry-tasting fish.  And who’s the last fish you knew who had an adoration of arid environments?

So here’s the cool thing about aluminum foil.  Yes, I know I have mentioned in previous posts that it kicks the clean-up time by MORE than half.  But another fantastic thing about this product is that; when you are baking a fish with skin on it, you can de-pan it, all the while, leaving the skin entirely behind.  (I used a fish spatula, which is essentially a longer-narrower version of a regular spatula; but appreciating that this is a pretty specific piece of equipment to identify in a regular kitchen, let it be known, without shame, that a standard spatula works just fantastically).

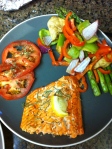
Soo…that’s really about all there is to it.  And, while I let this fish bake itself into a magnificent belly pleaser; I had some veggies roasting simultaneously in that same oven.  1/2 pound of fish per person (2 people); and a big pile of garlicky and seasoned roasted veggies on the side.

(VERY much a side note – but just a little hint if you try this same idea for your veggie side – start the veggies up a little earlier than your fish for maximum tenderness.  But damn, if veggies don’t taste good no matter how you do them up).

Thanks for fishing in.

Spaghetti Squash – Faux Spaghetti Noodles

Spaghetti squash as a side dish with grilled steak, steamed shrimp, and garlic cauliflower faux "mashed potatoes".

In an effort to create good meal variety and to attempt to curb some of those oh-so-yummy carb cravings felt so dearly during the non-cheat days of the 4HB lifestyle, there are some options out there that get pretty darn close, for what it’s worth.  When it comes to imitating pasta, you have to give squash credit where credit is due.  There are actually a few different methods for making faux pasta noodles; but for now, let’s just talk spaghetti.  And the product by which to make this work, naturally happens to be none other than the good ol’ spaghetti squash.  Get it? Thought you might.

The first time I attempted this recipe was my first time even using spaghetti squash, at all.  Of course I had overlooked it numerous times, previously, in the store; I mean – what a BEAST! But guess what – it turned out not quite as scary as I had originally cracked it up to be.  Yep – this is just how we learn things.

Ingredients:
1 spaghetti squash
1 tbsp extra virgin olive oil
Salt & Pepper to taste

Directions:
Preheat your oven to 375 F

Cut the spaghetti squash in half lengthwise. You will find that this type of squash is very tough to cut; so the easiest way, I’ve found, is to push the knife down vertically through the center along the squash’s side, and slowly lean pressure to either side along the length to begin easing into that horizontal cut.

Once you have successfully halved the squash, scoop out the center area with the seeds, and discard.

Drizzle olive oil onto the opened halves. Sprinkle with salt and pepper.

Turn the halves face-side-down onto a tin foil-lined baking sheet.  Bake for approximately 45-50 min.  (note: you’ll notice I did not use tin foil, below; however, in retrospect, while tin foil is certainly not a necessity, I could have bypassed the cleaning of the pan! Booo cleaning; yay just cooking).

Remove the pan from the oven and leave to rest for 5-10 minutes, allowing the squash to cool down some before handling.

When cool enough to handle, scrape the inside of each squash half lengthwise with a fork; and long, thin strings resembling spaghetti noodles will peel right out.

Spaghetti squash, itself, does not have much taste, so I would recommend topping it with some marinara sauce or pesto (as 4HB-friendly as possible!), or even a good solid shake of your favorite seasoning(s).  Serve immediately, while still warm.

Rainbow Chard Salad

Lately, I’ve been digging the idea of famers markets.  Usually I just do all of my grocery shopping at the local Trader Joe’s or Henry’s, but there’s just something nice and simple-like about hitting up a local farmers market on the weekend, checking the wide array of vegetables, fruits, etc.  And hey, you get to support local farmers in the process! I guess we’re not really on the fruit train anymore on 4HB lifestyle, but I can definitely go nuts over all the yummy vegetables! One lovely summer’s arrival-tease sort of Sundays, my husband and I decided to check out the La Jolla Farmers Market.  A pretty good one, if I do say so myself! Anyway, several of the vendors had, on their displays, the most beautiful bunches of rainbow chard, and I immediately wanted to find a way to use it.  I swear it was maybe a week earlier that I was watching the cooking show, Chopped, and I remembered they had rainbow chard in their baskets.  So maybe it was on my mind just a little.  But oh so pretty; time to figure out how to work this little culinary riddle! After a little internet dancing, I crossed upon a couple different ideas and landed upon a simple enough recipe.

Now let’s uncover this little pot of gold…

Ingredients:
1 bunch rainbow chard
Water and pot for boiling
Salt and pepper to taste
Extra virgin olive oil
Lemon wedge

Directions:
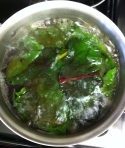
Bring a pot of water to a boil. Meanwhile, rinse the chard under cool water, making sure to remove any remaining dirt from the stems and leaves.

Separate the stems from the leaves.  The stems are much tougher and firmer than the leaves; therefore, these will naturally take a little more cooking time to soften enough to a level that will ultimately complement the wilted leaves well.

Cook the stems in the boiling water for 2-3 minutes.  Then, add the leaves and continue to cook for another 7-8 minutes.

Drain and rinse with cold water.  Press out as much water as you can with the back of a spoon or put in a salad spinner to release some of the extra moisture.  Drizzle with a small amount of olive oil and toss with salt, pepper, and a few squeezes of lemon juice – then plate it up as a tasty, colorful, and deliciously healthy side dish.

Rainbow Chard Salad with Slow Cooked Chuck Roast

 link to:  Slow Cooked Chuck Roast

Slow Cooked Chuck Roast

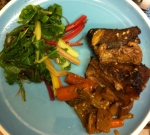
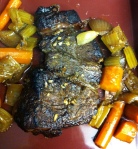
Slow Cooked Grass-Fed Chuck Roast & Veggies, with a side of Rainbow Chard Salad

Link to:  Rainbow Chard Salad

Slow-cooking is a relatively new thing for me.  I mean, the slow cooker has been literally sitting in my kitchen, readily available to me, all well-intentioned, for about a year now, just begging to be used.  But I can’t believe it took me this long.  So much easier just having some contraption sitting on the counter, cooking for me while I’m slaving away at work – and a great method for ye ‘ol 4HB lifestyle!

So, if you don’t mind, allow me to mildly deviate here and talk for a second about meat.  The husband and I have been frequenting this fantastic butcher shop in La Jolla, CA for the majority of our grass-fed meats lately: Homegrown Meats.  We never quite know what we’re in the market for when we enter…just depends what kind of sweet meats they have on display that day! Some things standard; some things new.  But we stock up…and we stock up well. This time I went for the chuck roast. Never having actually cooked a roast before; I was fully aware that, in the day of the internet, it is easy enough to pull up a well-enough reviewed, and easy-enough, bare-boned recipe off of which to base my own concoction.

So…without further adieu, I present to you – Chuck Roast.  Melt-in-your-mouth, fall right off the bone (if your meat even HAS a bone), style.

Ingredients:

  • 2 pounds chuck roast
  • salt, pepper to taste
  • 1 tsp garlic powder
  • 1/2 tbsp paprika
  • 1/2 tbsp onion powder
  • 1/2 tsp liquid smoke (optional)
  • 2-3 garlic cloves, minced
  • 1/2 cup beef broth
  • 3 carrots, chopped
  • 1 onion, quartered
  • 2 stalks celery, chopped
Directions:
Take the chuck roast and season with salt, pepper, garlic powder, and paprika.
In a large skillet over high heat, brown on all sides.
Place into the slow cooker and add the chopped veggies, onion powder, paprika, liquid smoke, and beef broth.  Place the quartered onion pieces on top of the meat and sprinkle with minced garlic.
Cover the crock pot and cook on low setting for 8-10 hours.  And…
Remove the meat and vegetables from the pot, reserving some of the remaining liquid for gravy.
And that, my friends, is the recipe to a melt-in-your-mouth, slow cooked hunk of meat, that is so tender and moist, it will just fall apart with the slightest touch of your fork.  And the veggies are so soft, yet not too soft where they just turn into a big pile of mush at the bottom of the pot.  Pretty much the whole package here, folks.  And as I always say, feel free to add some red pepper flakes or other spices if you crave that extra bite.
Work all day, home-cooked comfort food ready for the table just in time to welcome you back home.  Thanks for all your hard work, ol’ crock.

Breakfast Frittata

Slow Carb Frittata

Ah, a glorious way to start the day, indeed! I have to confess – I find that scrambled eggs loaded with veggies galore would be hard for me to become tired of (although I’m sure some will beg to differ).  But eggs are such a delicious, easy way to pack the protein in big time in the AM.  Needless to say, some mornings…you just don’t want to rush to get that first meal in your first 30/45 minutes out of bed, by pulling out the frying pan, oil method, and chopping up some additional veggies.  That’s a lot to think about while still in a fog.  I welcome, to your ovens, a yummy, easy, time efficient solution.  So easy.  No cooking professionalism needed, my friends.

Now, let’s get to the details:

Ingredients:
8 eggs
Vegetables (12 oz. or more/less)
2 cooked chicken breasts, diced (approx. 3.5-4 oz.) – (Trader Joe’s pre-cooked “Just Chicken” is a fast, convenient solution to add’l cooking)
1/2-2/3 cup of sliced almonds
Salt & Pepper to taste

Directions:

  • Preheat oven to 350 F
  • Beat eggs together, add salt & pepper
  • Add other ingredients, stir to combine
  • Pour into greased glass or other bakeware (I use a quiche dish) – a light, yet thorough, brush of olive oil will do the grease job well
  • Bake for 45-55 min (test by inserting knife or toothpick – when it comes out clean, you’re done!)
  • Cool, cover, and refrigerate, and there you have it, breakfast that will last for several days! Just microwave a slice in the AM, and voila! Quick, easy, tasty breakfast.

Frittata slice and turkey bacon! mmmm

Details that you just might not care about – but here’s where I get crazy (or make things just a bit more exciting):
Please don’t be thrown off by the all-allusive “12oz vegetables”.  Easily said, throw in a 12 oz frozen (preferably thawed) package of broccoli or spinach.  Or, if you’re a spazz and ridiculously chop-happy like myself, my frittatas usually end up with a mix of all kinds of veggies.  Whatever’s in the fridge, really.  And no, I don’t really measure so much these days….I say, the more veggies the better for ya…but don’t overdo it, as the eggs and chicken are the stars of the show. This is really about high-time protein, after all; so you don’t really want to wind up with too much content for the pan.

My extra ingredients, give or take:
– Eggs – 8 eggs is standard; but I like to swap a few/half of those out for egg whites. Use whatever equation you’d like, and remember that egg whites account for less egg volume than a full egg and its yolk…so compensate for that accordingly.
– Italian seasoning, crushed red pepper, a shake of dried basil
– My standard veggies tend to consist of: part broccoli, fresh shredded spinach leaves, jalapenos (i like it hot!), diced tomatoes, diced bell peppers, mushrooms…and so on.
– And…hey, why not add some salsa and/or hot sauce on top of your breakfast slice for extra zip!

Point of the personal add-ons?
My goal is to give you the basis for a good, convenient, time-efficient 4hb recipe; one which is easy enough for those who don’t do much cooking (at all), but also a recipe with PLENTY of room for personal tastes/embellishments. Furthermore, one that can last for days, and cater to an easy 4hb morning start.  I like good flavor, personally (given the addition of whatever spices I decide to grab from the cabinet and a healthy dose of hot-spice). And yes, true; I did claim I could eat eggs every morning and not get tired of them….but you’ve got to throw some seasoning in there from time-to-time. You’ll thank yourself.

Finally:
I hope you enjoy.