Paleo Carolina Barbeque Sauce

Just FYI...this is only half of the final product, leftover for fridge storage. I clearly have no patience for pictures when delicious eating can come first!

So I’m originally from South Carolina.  If you are at all familiar with BBQ of the Carolinas, perhaps you will understand this; if not, then perhaps you should just try it out for size.  Whatever the case, I’ve had a hankering for Carolina BBQ sauce lately.  Not the tomato-based, barbeque-stain-on-my-white-tshirt, type of BBQ….but the vinegar & mustard-based kind of sauce.  (I’m going to have to try hard to find it in my heart to forgive myself for referencing that country song quote, by the way…).  But lo and behold, I finally came across a recipe that omits the brown sugar, substituting a little maple syrup for sweetness – so I jumped right on it.  Only slightly modified from the original recipe.

Allow me to offer a disclaimer to myself here, however, by saying that I DID use a little Worcestershire sauce in this Carolina BBQ recipe.  Guilty as charged.  While not technically 100% paleo, there’s a small enough portion where I found I could just shrug it aside.  If you can’t…and believe me, I just checked for you – a quick internet search will lead you a few paleo Worcestershire sauce recipes out there.  Pick your poison :).  Maybe I’ll whip up some paleo Dub-sauce, myself, before fixing this sauce up again for round 2! (oh yes, there will be a round 2).

Que-ing it up:

Ingredients:
1 cup apple cider vinegar
6 tbsp Dijon mustard
2 tbsp maple syrup
4 tsp Worcestershire sauce
1 tsp hot sauce
1 cup extra virgin olive oil
2 tsp salt
1/2 tsp freshly ground black pepper 

Directions:

  • Combine all ingredients into a bowl, or shake together in a large jar. 
  • Store in the fridge for up to several months. (Ah, the gift of BBQ that just keeps on giving!)

Oh, so you know…this slow-cooked shredded chicken, below, is just basking and bathing in this delicious sauce! I just devoured it.  It was awesome.

Paleo Pumpkin Banana Walnut Muffins

I should be slapped on the hand for my level of inconsistency with these posts –  Particularly as it relates to this one, as this muffin recipe is requested by the hubby on at LEAST a weekly basis!  I very much enjoy them, too, of course 🙂

I found this recipe awhile back – I would say, around October/November or so – when pumpkin was the hot ingredient of the moment.  But when the cans of pumpkin slowly began to diminish in stock at my local Trader Joes, I knew drastic measures needed to be taken.  I wound up stocking up in bulk on cans through my good friend, Amazon.com.  That’s about the only ingredient in the mix that carries a bit of a seasonal tone.  Granted, you could substitute something just as tasty (or perhaps even omit, adding an extra banana or 2); but something just seems lacking without it, in my humble opinion! Yum pumpkin.

Onward muffins…

Ingredients:
1 1/2 cup almond flour
1 tsp baking powder
1 tsp baking soda
4 tsp cinnamon
1 banana, mashed
3 eggs
1 cup canned pumpkin
2 tbsp raw honey
2 tbsp almond butter
1 tsp pure vanilla extract
Chopped walnuts, or any other nut (optional)
Unsweetened shredded coconut (optional)
Blueberries (optional)

Directions:

  • Pre-heat oven to 375 F
  • Grease muffin tins, as needed, with olive oil (this recipe will make 12 muffins)
  • In a small bowl, combine the dry ingredients (almond flour, baking powder, baking soda, cinnamon).  Stir to mix ingredients evenly and set aside.
  • In a medium bowl, mash-up the banana with a fork.
  • Add the eggs to the mashed banana. Stir to combine.
  • Add the remaining wet ingredients to the egg/banana mixture (canned pumpkin, raw honey, almond butter, vanilla extract).  Stir well to combine.
  • Pour the dry ingredients into the bowl of wet ingredients.
  • Stir until the dry and wet ingredients are well-incorporated.
  • Add a handful of chopped walnuts, unsweetened coconut, blueberries, or any other desired accessory (or not!).  Give a few stirs to evenly distribute these ingredients throughout the batter.
  • With a spoon, evenly distribute the batter into the 12 greased muffin tins.
  • Optional: top each muffin with a couple pecan halves or sliced almonds, for aesthetic value!
  • Bake in pre-heated oven for 18 minutes
  • Let cool in the tins about 10 minutes.  Then, remove from tins by first gently circling the muffin with a knife in order to loosen the muffin out.

Tips:
-Store in refrigerator for longer-lasting muffins
-To reheat, nuke for about 20-30 seconds

Broccoli, Sausage & Egg Muffins

I stumbled upon this recipe over the weekend and thought I’d give it a try! I just modified a few minor details to ensure a Paleo diet quality.

The main component of our breakfasts are eggs, typically either frittata-style, (which is easy for advanced prep, and a few days’ worth of reheatable breakfasts); or simply scrambling up some eggs with whatever veggies and pre-cooked meats happen to be in the fridge on that morning’s occasion.  I thought these muffins would be a nice change in the rotation on the pre-cooked breakfast front, so I gave them a try! Plus – they’re kind of cute, these little muffins…don’t you think?

So onto packing those tins!

Ingredients:

  • 1 lb ground sausage (pre-seasoned, or self-seasoned: I like to season my own & make spicy! Plus, that way I know exactly what’s going into the sausage on the seasoning-front)
  • 1 cup broccoli florets
  • 8 large eggs
  • 1/4 cup coconut milk
  • 1/2 tsp baking powder
  • Salt & Pepper, to taste
  • Crushed red pepper (optional)
  • Olive oil for greasing muffin tins

Directions:

  • Pre-heat oven to 375 F
  • In a large saute pan over medium heat, cook the sausage until it is browned, no pink remaining (about 5-7 minutes).
  • Remove pan from heat and stir in the broccoli florets. Set aside.
  • In a medium mixing bowl, whisk together the eggs. Add the coconut milk & baking powder, and continue to whisk to combine.
  • Season with a little salt & pepper, and add red pepper flakes to your liking.  Whisk again to combine.
  • Lightly spray or coat a 12-cup muffin tin with olive oil.
  • Spoon in the sausage & broccoli mix evenly amongst each of the 12 cups.
  • Ladle the egg mixture over the sausage & broccoli.
  • Bake for 15-20 minutes

* To re-heat, I put 4 muffins in the microwave for about 2 1/2 minutes.

Since there are only two of us in the household, and because my honest intention is to have ready-to-heat-up muffins at my fingertips for a few days (2 muffins per serving); I would suggest storing them by wrapping them in aluminum foil or putting in a sealed container for the fridge.  At first, I just tossed them into a gallon-sized Ziploc freezer bag, but it got a little condensation in it (not that it mattered in the least bit after reheating…I simply didn’t like reaching my hand into dampness to retrieve!).

Store to your pleasure and enjoy!

Coconut Flour Paleo Waffles and Pancakes

Well, I have had a bit of a writer’s block lately.  Or perhaps it has more to do with having less time (at least in the evenings) for cooking up new creations.  But nonetheless, I’m still here, whipping up a delicious storm! Believe.

I should add that, over time, I have slowly made the migration over to the Paleo “Lifestyle” from that of the “Four Hour Body.”  Four Hour is very much still the driver behind these recipes – they are similar enough.  Really – I would describe it as with the allowance for a few extra ingredients in the Paleo-food world (i.e., sweet potato; raw honey; a touch of fruit, namely bananas and berries).  I still use beans from time to time (hardy is as chili does!), but as such, I will do my best to classify these recipes as accordingly as possible!

That being said, a new breakfast treat I’ve enjoyed cooking for the hubby and myself on the weekends lately (weekends = when I actually have the time in the morning to cook from scratch!), are Paleo Waffles.  Or Paleo pancakes.  Batter is one in the same, of course.  Waffles are just so much cooler, in my opinion.

I had tried a few different recipes for Paleo pancakes through general internet recipe browsing, and finally found one that actually tasted good enough to bother with making a Paleo-style pancake.  They had the right consistency, fluffiness, and stuck together just right.  You can find the recipe here, or below.

Ingredients:

  • 4 eggs
  • 1 cup coconut milk
  • 2 teaspoons vanilla extract
  • 1 tablespoon honey
  • 1/2 cup coconut flour
  • 1 teaspoons baking soda
  • 1/2 teaspoon sea salt
  • 1/4 teaspoon cinnamon
  • Coconut oil for greasing waffle iron or griddle/pan
  • Blueberries (optional)
  • Walnuts (optional)

Directions:

  • If making waffles, grease the waffle grid and allow the waffle iron to heat up.
  • If making pancakes, preheat pan or griddle over medium-low heat.
  • Beat eggs in a stand mixer until frothy.  Mix in coconut milk, vanilla, and honey.
  • In a small bowl, combine the dry ingredients: coconut flour, baking soda, sea salt and cinnamon; stir together to combine.
  • Combine dry mixture with wet in the stand mixer and beat on medium speed for about 30 seconds.  Scrape down the sides of the bowl, then mix on medium to medium-high for another minute or two, until the dry ingredients are completely mixed into the batter.Once your batter is complete, add desired amount of blueberries and walnuts, and stir into the batter gently to distribute evenly.
  • If making waffles, spoon several scoops of batter in the center of the waffle iron and cook to desired completion
  • If making pancakes, pour batter into discs that are 3 inches in diameter – cook for about 3 minutes on one side, flip, then cook an additional 2-3 minutes on the other side.
  • Then I strongly encourage you to stack ’em high.

Steamed Radishes with Mixed Veggies

I wasn’t entirely sure whether to title this veggie side dish recipe for strictly radishes or for the hodgepodge of other veggies that joined in on the fun for this particular side….so don’t be thrown off.  Yes, radishes are vegetables, too – I know.  Let’s just say that I credit them as the inspiration of this post, as it was a new food ingredient for me to work with. 

I ordered a CSA vegetable package that was presented as a deal on GiltTaste from who-knows-what farm out in Ohio, in hopes I’d be forced to reckon with some not-yet-experimented-upon veggies.  Radishes are just not something I had attempted to prepare before (sure, easy enough – but just not usually my first grab at the veggie counter).  Plus, they look like they could take some serious prep time, the dirty little suckers.

But shame on me for assuming – these weren’t so difficult! And they turned out super tasty when steamed! I might just restock my basket next grocery run…

Ingredients:
Radishes (however many you desire!)
Mixed veggies (I find that carrots, squash/zucchini work best for steaming)
Salt & Pepper
Ghee (or butter)

Directions:

  • Over high heat, place a pot of water (in a pot large enough to accommodate a steamer basket insert), and bring to a boil.
  • While waiting for the water to boil, rinse the radishes off in a colander.  Use a paper towel to rub any leftover dirt from the outside.

  • With a small paring knife remove the ends.
  • Peel off the first outside layer of red (I will admit I left some of mine on, and these tasted just as well).

  • Cut up any other veggies, if any, that you wish to include with the radishes.
  • Season and toss veggies with salt and pepper (and any other seasonings, if desired).
  • When the water has reached a boil, place the veggies in the steamer insert, partially covering the pot with a lid.

  • Steam for 10-15 minutes, to desired tenderness, removing the lid to stir occasionally.
  • When finished, remove the steamer basket of veggies from the pot and let sit in the sink (or empty its contents into a colander first, if not a free-standing steamer basket).
  • Top the steaming veggies with a scoop of ghee, and toss to coat.  Season with more salt & pepper for taste, as desired.
  • Plate, and enjoy!

Almond-Crusted Tilapia

Over a bed of salad, topped with crumbled walnuts

To repeat myself in so many ways, fish caters to an easy method for whipping up a quick, protein-rich meal.  Why not kick it up a notch and try it 4HB crispy-style?  I feel almost guilty claiming this to be a new recipe; but a new method is certainly worthy of a new post.  And while not quite full-on breaded quality, the almond flour will get you a whole lot closer than you’d expect.  And you’ll feel you’re giving yourself a bit of a treat!

Ingredients:
4 filets, tilapia
1 lemon
Salt
Pepper
1/2 cup almonds, slivered or sliced
2 eggs (or 3 egg whites)

Directions:

  • Rinse the tilapia under cold water and pat to dry.
  • Season both sides of the fish with salt and pepper.  Squeeze a little lemon juice on both sides, as well.
  • In a small food processor, chop up the sliced or slivered almonds until you have a course powder.  Pour onto a flat plate and set aside.
  • In a wide-mouthed bowl, whisk together the eggs (or egg whites).  Add any additional seasonings (or just a little extra salt & pepper), and whisk again to combine.
  • Place the egg bowl and plate of crushed almonds side-by-side.
  • Dip both sides of a filet into the egg mixture.
  • Shaking (or letting drip off) the excess egg, dredge the soaked filet into the almond powder to coat.  Set coated filet aside and do the same to your remaining filets.

  • Heat coconut oil in a large frying pan over medium-high heat.
  • Place filets in the pan  and cook for 3-4 minutes per each side of the fish.

  • Plate and….Voila! Enjoy your crispy fish.

Grilled Marinated Lamb Loin

A lamb first-timer! Never cooked it; haven’t consumed with great frequency.  No particular reason, other than it’s a bit out there from the standard steak or chicken.  But meat is meat; meat is a big part of my diet these days; so let’s explore the possibilities!

Over the past few months, my husband has placed a couple of meat orders from U.S. Wellness Meats (goal: stocking up our freezer with quality grass-fed meats for any day of the week!).  The second time around, we decided to get a little bit adventurous and added a lamb loin to the order.  I like a challenge; and am all for researching recipes for the unfamiliar in order to make it 4HB friendly, and our own!

So quite simply, quite tastily, and not-so-sheepishly; I share with you a flavorful and juicy recipe for lamb loin, grill-style!

Ingredients:
1 tbsp extra virgin olive oil
1 lemon, zested (about 1/2 tsp)
1 lemon, juiced (about 2 tbsp)
2 tsp, dried oregano
2 tbsp garlic, minced
1/2 tsp salt
1/4 tsp pepper, freshly ground
2 lamb loins (approx. 4 oz. apiece)

Directions:

  • In a bowl, combine the first 7 ingredients to create your marinade.
  • Pour marinade into a sealable plastic bag.
  • Add the lamb loin(s) to the bag and toss to coat well in the marinade.
  • Marinate in the refrigerator for at least 1 hour.
  • Grill over medium-high heat for approximately 5 minutes on each side.
  • Let sit for a couple of minutes before serving.

Mini Butternut Squash Pizzas


Butternut squash pizzas with pesto, tomato, and fresh basil

Mmm Pizza! One thing I tend to crave with frequency on my cheat days! There are a slew of different methods slow-carbers have put out there in an attempt to bridge that deep, dark 6-day void left by some distant pizza memory; and I fully intend to try some of them out to see how close I can get to slow-carb “pizza”  ……Eventually…   But this one was simple enough to give it a shot right away.  Plus, I had half of a butternut squash left over from the jalapeno cheddar quiche that I had just made.  Have you SEEN the size of a butternut squash?! Resources, people! Use ’em up.

I stumbled upon this grain-free mini pizzas recipe while internet browsing on some grain-free (yep, go figure!) recipe sites.  I am glad to have found this one, as it works rather well as a fun, somewhat unique, little veggie side dish.  And thes are not all that time-consuming to make, either (bonus!). And, of course, as it goes with pizza, the topping combination possibilities are endless.  I’m a big fan of using up whatever veggies I have in that fridge of mine.

Crust it up.

Ingredients:
1 large butternut squash (use all, or some, depending on how many mini-pizzas you intend to make)
Marinara, tomato, or pesto sauce (keep an eye on the sugar content!)
1 tomato
Fresh basil leaves
Any other toppings that you’d like!
Salt & Pepper, to taste
Coconut oil or ghee, for cooking

Directions:

  • Using a vegetable peeler or sharp knife, peel or cut away the thick outer skin of the butternut squash.
  • With a mandolin or sharp paring knife, slice the squash into thin disks or rounds (around 1/4 of an inch thick).
  • Prepare any veggies you plan to use as toppings and set them beside the stove.
  • Heat oil or ghee in a non-stick fry pan over medium-low heat.
  • Add squash slices and cover the pan with a lid.  Check the squash after 3 minutes.  If they are starting to turn a little brown, flip them over.  Cover and continue cooking the other side of the squash for another 3 minutes. 
  • Add sauce (if using sauce) and any other toppings.  Season with Salt and Pepper, to taste.  Cover for a few minutes.
  • Remove the pan from the heat and allow the mini pizzas to cool some.
  • Then…I think you know what to do.

Season Rubbed Pork Tenderloin

I’m telling you – I have become quite fond of the pork tenderloin! With the rosemary and balsamic grilled tenderloin recipe under my belt, I wanted to try another version with more of a simple (yet flavorful!) rub-quality.  And this time, I did it oven-roasted style.   I had almost all of the necessary ingredients in the spice rack, already – so it did not take a lot of shopping prep (simply just remembering to buy the meat!).  And, of course, to give credit where credit is due – I pulled this recipe from Ellie Krieger via Food Network.

Here’s the rub-down:

Ingredients:
1 tsp garlic powder
1 tsp dried oregano
1 tsp ground cumin
1 tsp ground coriander
Salt
1 lb pork tenderloin
1 tbsp extra virgin olive oil
2 cloves garlic, minced

Directions:

  • Pre-heat the oven to 450 F
  • To create the rub, combine the dry ingredients (garlic powder, oregano, cumin, coriander, salt) in a small bowl, mixing well with a fork.

  • Sprinkle over the outside of the pork tenderloin, turning to coat.
  • With your hands, rub well over the entire tenderloin, occasionally patting to ensure adhesiveness.

(I usually coat the tenderloin in the spice rub in the morning and allow it to marinate in the refrigerator during the day.  But you can go ahead and begin cooking at this point, if you prefer).

  • When ready to cook (again, with the oven pre-heated to 450 F), heat 1 tbsp of olive oil in a frying pan over medium-high heat.
  • Sear the sides of the tenderloin in the heated oil, rotating occasionally with tongs to cover all of its surfaces, for about 10 minutes. 
  • A few minutes into the 10-minute sear time, add minced garlic to the pan with the searing tenderloin.  (The garlic will burn if you leave it cooking in the pan for the full amount of time).
  • When finished, transfer the tenderloin onto a roasting pan and put in the oven for another 20 minutes.
  • Allow to cool for 5 minutes or so after removing the tenderloin from the oven; then slice and serve!

Jalapeno Cheddar Quiche with a Butternut Squash Crust


A quiche treat! My husband came across this recipe on the web, and we were both pretty eager to try it out.  Now, I’ll admit it…I do have a fault of being a bit too much of a stickler when it comes to the 4-HB rules; so, at first, I was a little wary of the small amount of cheddar cheese involved in the recipe.  But these things are fine on the occasion; and if you’re going to use cheese, sharp cheddar is one of the best choices!

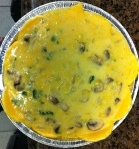
All hesitations aside, we prepared this quiche and had a slice with our dinner that evening.  It was rich and delicious! Seriously.  So much flavor! And suffice it to say, I am impressed with how well butternut squash slices worked to make the crust at the bottom.  I think this method just might be featured in several other food creations in the very near future.

Here’s to melt-in-your mouth eggy goodness:

Ingredients:

1 medium butternut squash (you’ll use half)
Coconut oil or EVOO (for greasing pie pan)
5 eggs
1/4 cup coconut milk
4 oz sharp cheddar cheese, grated
2 tbsp butter
1/2 large onion, chopped
1 cup mushrooms, sliced
2 jalapenos or serano peppers

Directions:

  • Pre-heat the oven to 375 F.
  • Roast the jalapenos or seranos in the part of the oven closest to the heat source.  After about 3 minutes, turn the peppers over and continue roasting for another 3 minutes.  The sides of the peppers will become slightly blackened.

  • Remove from the oven and allow to cool.  Once cooled, peel off the outer skin and scrape out the seeds.  Discard the skin, seeds, and the stem.  Finely dice the remaining peppers and set aside.

  • Peel off the thick outer skin of the butternut squash with a vegetable peeler or sharp paring knife (the skin will be tough!).  Slice off the squash ends and discard with peel.
  • Using a mandolin or very sharp knife, slice the squash into very thin rounds.
  • Lightly coat the bottom of a pie pan with coconut oil or olive oil and place butternut squash rounds in the bottom of the pan, and up along the sides.  For the sides, you may need to slice the rounds into halves to fit.

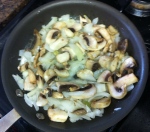
  • Melt the butter in a frying pan over medium-high heat.  Add the chopped onions and sliced mushrooms and saute until softened, and onions translucent.  Pull off of the heat source and set to the side.

Husband sauteeing up a storm.

  • In a medium bowl, whisk the eggs together with the coconut milk.  Add the cheddar cheese and whisk again.  Add the sautéed onions and mushrooms to the bowl, along with the peppers.  Stir to combine.

  • Pour filling into the butternut squash-lined pie pan. 
  • With oil, lightly brush the exposed edges of the butternut squash.

  • Bake in the oven for 35-40 minutes (I would recommend placing the pie dish on a baking pan in the case of overflowing).  If an inserted knife comes out clean, it is finished!
  • Finally, allow the quiche to cool.  Then…slice and serve!